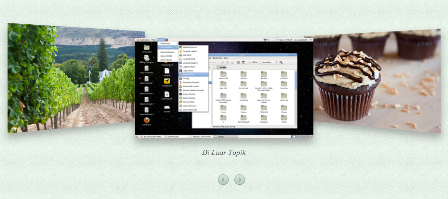
Automatic Slideshow for Blogger with 3D Gallery
Pembaharuan: 9 Desember 2013
A letter from Arhan Tubar:
Hello I like very much the automatic slideshow tutorial and I was wondering if you can help me with something.
I would like to make the slideshow from this link:
http://tympanus.net/codrops/2012/02/06/3d-gallery-with-css3-and-jquery/
...to be automatic like in your tutorials.
Can you help me with this request?
Thank you in advance.
My answer is, “Yes, why not. This is just about inserting images into 3D Gallery markup. A special post for you. Sorry about my bad English” :p
Step 1: Edit Your Tema
First go to the Tema menu and then click Edit HTML and click Continue/Proceed:
Find this code:
]]></b:skin>
Copy the code below and paste it above ]]></b:skin>:
/*!
 * Automatic 3D Gallery by Taufik Nurrohman
 * http://gplus.to/tovic
 */

.dg-container {
  width:100%;
  height:450px;
  position:relative;
}
.dg-wrapper {
  width:481px;
  height:316px;
  margin:0 auto;
  position:relative;
  -webkit-transform-style:preserve-3d;
  -moz-transform-style:preserve-3d;
  -ms-transform-style:preserve-3d;
  -o-transform-style:preserve-3d;
  transform-style:preserve-3d;
  -webkit-perspective:1000px;
  -moz-perspective:1000px;
  -ms-perspective:1000px;
  -o-perspective:1000px;
  perspective:1000px;
}
.dg-wrapper a {
  display:block;
  position:absolute;
  left:0;
  top:0;
  background:transparent url('https://blogger.googleusercontent.com/img/b/R29vZ2xl/AVvXsEg_nIK4CRM7MMkY71VxAsfHSapzKGMeUAIOcSqS4L-YNKZAX7pqRtPSP2-6iG7q_HazoqIO9xbekVMhe12tu2dufmck71e39n8kCftRedzkluQNtOqY8le54jygCOC_JhgtUWyXHQBd-yU/s1600/browser.png') no-repeat 0 0;
  -webkit-background-size:100% 100%;
  -moz-background-size:100% 100%;
  background-size:100% 100%;
  -webkit-box-shadow:0 10px 20px rgba(0,0,0,.3);
  -moz-box-shadow:0 10px 20px rgba(0,0,0,.3);
  box-shadow:0 10px 20px rgba(0,0,0,.3);
  -webkit-border-radius:4px;
  -moz-border-radius:4px;
  border-radius:4px;
}
.dg-wrapper a.dg-transition {
  -webkit-transition:all .5s ease-in-out;
  -moz-transition:all .5s ease-in-out;
  -ms-transition:all .5s ease-in-out;
  -o-transition:all .5s ease-in-out;
  transition:all .5s ease-in-out;
}
.dg-wrapper a img {
  display:block;
  margin:0;
  padding:41px 0 0 1px;
  border:none;
  outline:none;
}
.dg-wrapper a .dg-caption {
  font:italic normal 16px/50px Georgia,"URW Bookman L",Serif;
  text-align:center;
  width:100%;
  height:50px;
  white-space:nowrap;
  overflow:hidden;
  text-overflow:ellipsis;
  text-shadow:1px 1px 1px rgba(255,255,255,.5);
  color:#333;
  display:none;
  position:absolute;
  bottom:-55px;
}
.dg-wrapper a.dg-center .dg-caption {display:block}
.dg-container .dg-nav {
  width:58px;
  position:absolute;
  z-index:1000;
  bottom:40px;
  left:50%;
  margin-left:-29px;
}
.dg-container .dg-nav span {
  text-indent:-9000px;
  float:left;
  cursor:pointer;
  width:24px;
  height:25px;
  opacity:0.8;
  background:transparent url('https://blogger.googleusercontent.com/img/b/R29vZ2xl/AVvXsEhwwqDJL_9HUgdWKf_WS4ptg_vloLJgK5JvmmYwZfSumMLqnt9fZNW9nmmUBBCUumun-DCKlGs3DdNjsnuvr46va62Z_sUlCMNKp-nCxl4j-b2znFRgwTMatSm37H8mLibdNJ1__oVnqJM/s1600/arrows.png') no-repeat 0 0;
}
.dg-container .dg-nav span:hover {opacity:1}
.dg-container .dg-nav span.dg-nav-next {
  background-position:100% 0;
  margin-left:10px;
}
.dg-caption-date:before,
.dg-caption-comment:before {content:" - "}
.dg-caption-comment {display:none}
Save your tema.
Step 2: Puting the Slideshow
Go to the Layout menu, then add a new HTML/JavaScript page element that placed above the posts:

Copy the code below and paste it on the form:
<section id="dg-container" class="dg-container"></div><script src="//ajax.googleapis.com/ajax/libs/jquery/1.10.2/jquery.min.js"></script><script>
var gallery_config = {
url: 'http://dte-feed.blogspot.com',
numPost: 3,
labelName: null,
monthArray: [
"Januari",
"Februari",
"Maret",
"April",
"Mei",
"Juni",
"Juli",
"Agustus",
"September",
"Oktober",
"November",
"Desember"
],
noImage: 'data:image/png;base64,iVBORw0KGgoAAAANSUhEUgAAAAEAAAABCAIAAACQd1PeAAAAA3NCSVQICAjb4U/gAAAADElEQVQImWOor68HAAL+AX7vOF2TAAAAAElFTkSuQmCC',
newTabLink: false,
containerId: 'dg-container',
slider: {
itemWidth: 480,
itemHeight: 260,
prevText: '<',
nextText: '>',
current: 0,
autoplay: false,
interval: 2000
}
};
</script>
<script src="//dte-project.googlecode.com/svn/trunk/blogger-3d-gallery.js"></script>The underlined code is jQuery. If your tema already have a jQuery, remove the underlined code! We just need one forever.
Slideshow Configuration
| Option | Description |
|---|---|
| url | Change with your blog homepage URL. |
| numPost | Used to set the number of slides. |
| labelName | Used to determine the specific label name to sort the posts by a specific label. |
| monthArray | Array of month names. |
| noImage | Change with your own “no image” URL. |
| newTabLink | If true, every link will automatically open in new tab/new window. |
| containerId | ID of the slideshow container. |
| slider => itemWidth | Image width in pixels. |
| slider => itemHeight | Image height in pixels. |
| slider => autoplay | If true, the slideshow will be played automatically. |
| slider => interval | Slideshow interval if autoplay set to true. |
Few suggestions: This slideshow is only use CSS3 Transition and CSS3 Transformation for the animation machine. This fact will be very closely related to the browser support (although we have used the Modernizr script so we will get a very nice fallback slideshow for the browser that does not support it). If you are interested, I'll post back a better similar slideshow that support for all browsers. This is called ImageFlow 1.3.0. Just wait :)
Edit: Here it is!


7 Comments:
Very Good, ini lebih bagus tapi apa cukup ya untuk area yang kecil :D
By Sinto, at Wednesday, February 29, 2012 at 3:18:00 PM GMT+7
Thank you very much for this tutorial. I have only one question: How do you create that javascript used for making the post appear in the slideshow?
http://reader-download.googlecode.com/files/autoContent43DGallery.js
You create it manually or you use a tool to create it automatic.
By Anonymous, at Wednesday, February 29, 2012 at 3:58:00 PM GMT+7
@SamirAutos I have a basic JSON script that I created from several studies and incorporation of existing scripts (you can find it on Google), so I can produce thumbnails, descriptions, and other comments into a variable. After that, I can insert those variables into markup that created by JavaScript. For example:
document.write('<li class="sliderImage">');
document.write('<a href="' + posturl + '" target="_blank"><img src="' + img[o] + '" alt="" class="recent-thumb" /></a>');
document.write('<span><a href="' + posturl + '" class="recent-link" target="_blank">' + posttitle + '</a><br />' + postcontent + cmtext + '</span>');
document.write('</li>');
Even you don't have to be good in JavaScript.
By Taufik Nurrohman, at Thursday, March 1, 2012 at 11:07:00 AM GMT+7
@system of blog Agak sulit, tapi bisa tuh dicoba mengedit lebar setiap item slide:
.dg-wrapper a {
width:370px;
...
...
}
By Taufik Nurrohman, at Thursday, March 1, 2012 at 11:11:00 AM GMT+7
@Taufik NurrohmanI think if you make a tutorial about it many users will be thanking you :D
By Anonymous, at Thursday, March 1, 2012 at 1:25:00 PM GMT+7
@SamirAutos Of course. But maybe not now. You know, Superman does not come before the monster completely gripping a beautiful girl haha..
By Taufik Nurrohman, at Thursday, March 1, 2012 at 4:51:00 PM GMT+7
ada nggak widget slideshow gallery yang bisa memunculkan gambar dari berbagai ukuran? tapi pada slideshownya ukurannya dijadikan sama..
karena saya coba tuh gambar yang dimunculkan hanya dari postingan yang memuat gambar dengan ukuran kecil kemudian diperbesar, sementara gambar yang besar malah tidak turut dimuat dan digantikan gambar cadangan.
kok jadi ribet gini ya pertanyaannya??? :D
By dhanyn10, at Tuesday, July 30, 2013 at 11:20:00 PM GMT+7
Post a Comment
<< Home